App Registration
This step configures how users authenticate to Pozi Web App, what permissions the app has, and how it integrates with your organisation’s security policies. It ensures secure sign-in, access control, and API permissions for your application.
Please make sure you have completed the steps in Application Proxy.
1. Configure Pozi Server application registration
The creation of the Pozi Server Enterprise Application also creates an app registration with the same name.
Search for this app in the App registrations section in Entra ID.

2. Authentication
In this section, we will make sure that an authenticated user is granted access through the Pozi Web App.
Go to Authentication (Preview) in the left menu. The page shows a Redirect URI configuration tab with a table of existing redirect URIs organised by platform type: Web and Single-page application.
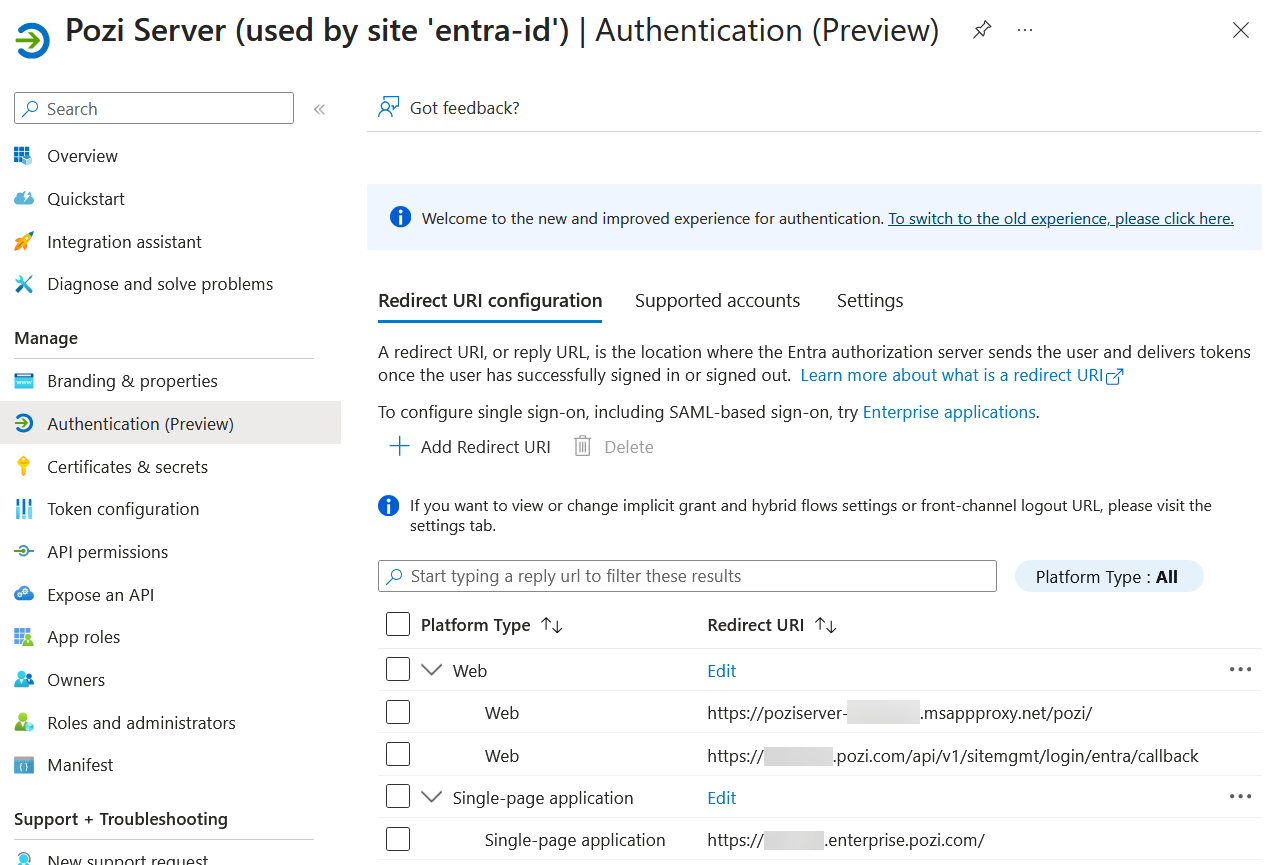
Confirm that one redirect URI already exists under the Web platform type pointing to the Application Proxy URL configured in the previous section. If it is not there, add it now.
Adding redirect URIs
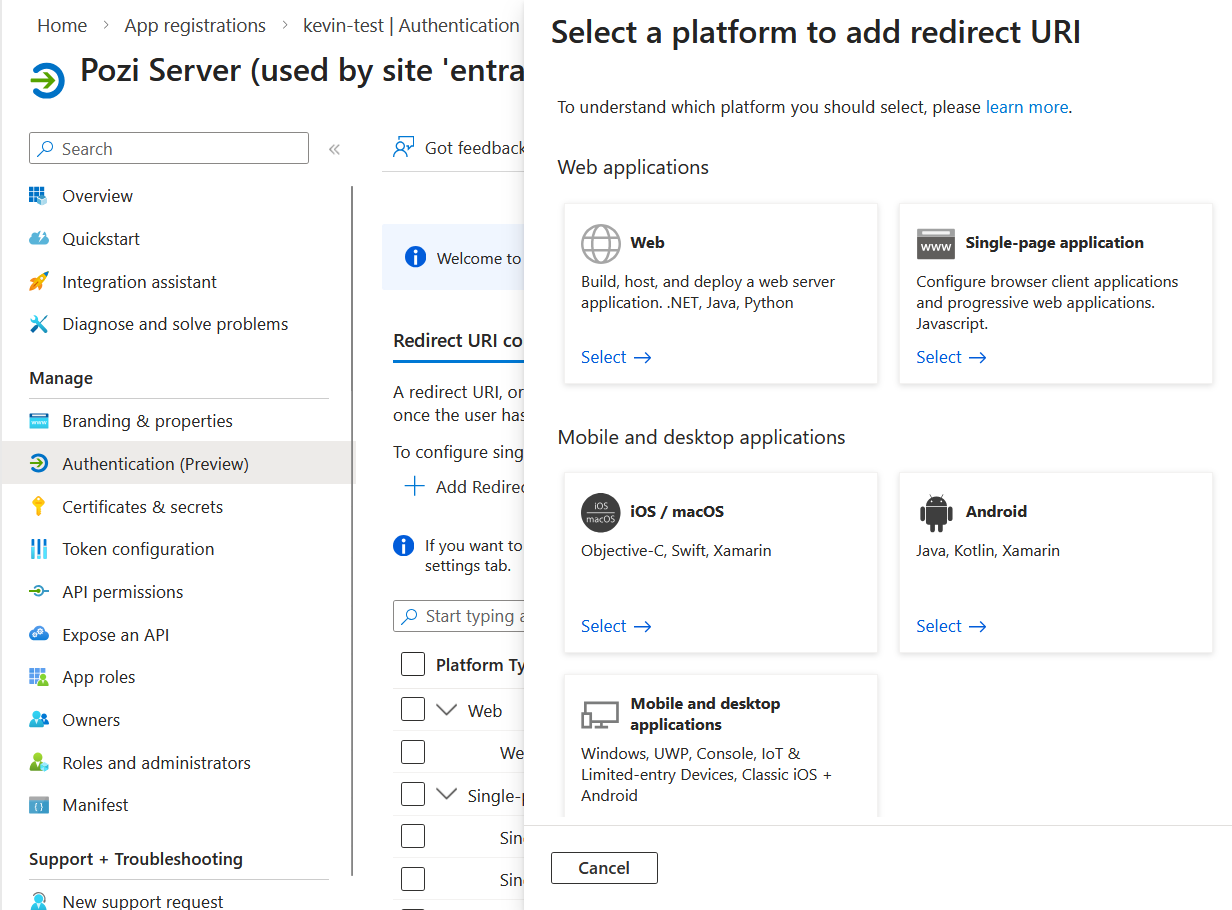
To add a redirect URI, click + Add Redirect URI. A panel will appear prompting you to select a platform.
Add the following URI under the Web platform:
https://<pozi-site-name>.pozi.com/api/v1/sitemgmt/login/entra/callback
Select Web from the platform selection window, enter the URI, and click Configure.
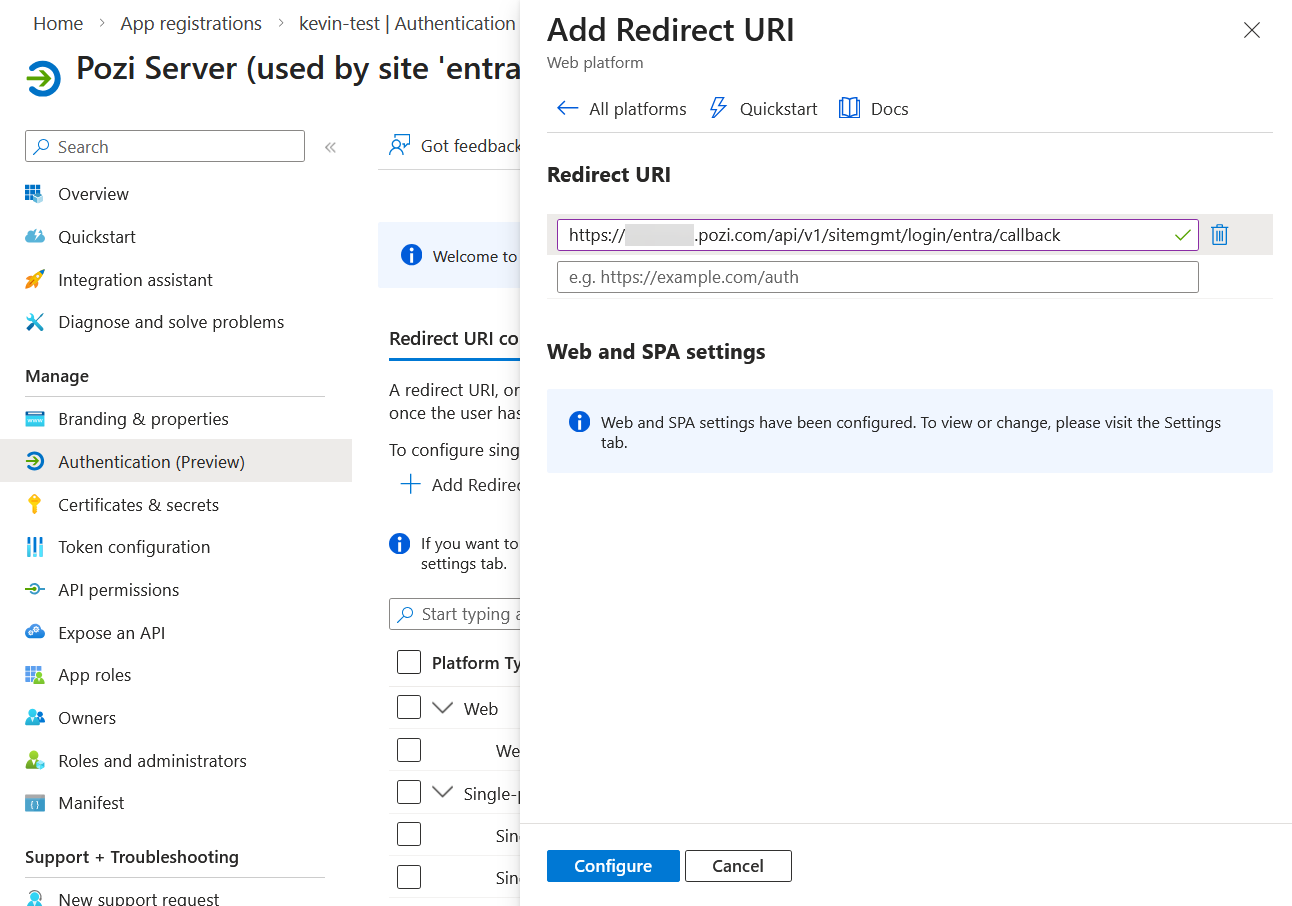
After saving, a message will appear: “Web and SPA settings have been configured. To view or change, please visit the Settings tab.” This refers to the token settings configured below.
Add the following URIs under the Single-page application platform. Click + Add Redirect URI and select Single-page application for each one:
http://localhost/for Pozi development purposeshttps://staging.pozi.com/for client testing and debugginghttps://<pozi-site-name>.enterprise.pozi.com/replacing<pozi-site-name>with the actual site namehttps://<pozi-site-name>-entra-id.enterprise.pozi.com/optionally, for clients transitioning an existing site to Entra ID
Token settings
Click the Settings tab and confirm that the following have the values below:
- Access tokens:
Unchecked - ID tokens:
Checked - Enable the following mobile and desktop flows:
No
Note
Pozi’s requirement for ID tokens has changed from Unchecked to Checked. Existing Entra configurations may not yet reflect this change.
3. Create a client secret
This section covers creating a Client Secret.
In the menu on the left-hand side of the screen, choose Certificates & secrets.
Add a client secret:
- set the description
- set the expiration date
Immediately copy the secret Value, as it will need to be used in Pozi configuration.
4. Expose an API (user_impersonation)
This section covers a crucial setting that allows the application to access Pozi Server on behalf of the user: the user_impersonation scope.
Go to the Expose an API section of Pozi Server.
First, confirm that the Application ID URI looks something like https://poziserver-<entra-application-client-name>.msappproxy.net/pozi. This should not be changed.

Make sure there is one scope defined called user_impersonation, prefixed by the Application ID URI above.
Often, this scope is created by Entra ID automatically, but not in every organisation. If this scope is missing, add it as follows.

- Scope name:
user_impersonation - Who can consent?:
Admins only - Admin consent display name:
Access Pozi Server - Admin consent description:
Allow the application to access Pozi Server on behalf of the signed-in user. - User consent display name:
Access Pozi Server(optional) - User consent description:
Allow the application to access Pozi Server on your behalf.(optional) - State:
Enabled

The scope above will be used in the Site Configuration in Pozi in the Scopes section. It should look something like:
https://poziserver-<entra-application-client-name>.msappproxy.net/pozi/user_impersonation
5. Access control
It is possible to further control user access to map catalogues (ie QGIS projects) in Pozi Web App. To enforce this access control, Pozi Web App needs to know which Entra ID groups each user belongs to.
This section describes how to provide Pozi Web App with the relevant group information.

Go to the Token configuration section and click Add groups claim. Then select the desired group types. In most cases, Security groups is sufficient. Keep the default settings.

That is all that is needed in Entra ID. Pozi Web App will receive the group information as a list of group IDs, like this:
"groups": [
    "81ddec0b-6a1a-426a-9826-e869eef6473f",
    "17b3a8a0-bc11-4ec3-810e-94c74201b41e",
    "5ee9c710-26aa-40be-90be-36afa6fc2003",
    "3adf8e2e-7628-41ee-b902-b105f231758e",
    "c034a6cd-2b7d-4336-9f9e-9bb896ad1110"
]
Email your Pozi support provider’s helpdesk with your list of group IDs and which catalogues (ie QGIS projects) each group should have access to.
The group IDs can be found under Identity > Groups > All groups.

6. Token Claims, App Roles, and API Permissions
This section configures additional token claims, app roles, and API permissions for the Pozi app registration in Entra ID.
Token Configuration
- Navigate to the Token configuration section.
- Click Add optional claim.
- Set Token type to ID.
- Select email and click Add.
You should now see the claim in the list.

App Roles
- Click Create app role.
- Configure the app role with the following settings:
- Display name:
Pozi - Allowed member types:
Applications - Value:
pozi.read - Description: a short description appropriate to your organisation
- Display name:

API Permissions
- Click Add a permission.
- Select APIs my organization uses, search for Pozi, and select it.
- Choose Application permissions.
- Check pozi.read and click Add permissions.
- If the Microsoft Graph email permission is not already present:
- Click Add permission.
- Select Microsoft Graph.
- Choose Delegated permissions.
- Check email and click Add permissions.
- Click Grant admin consent for the required permissions.

Notify your Pozi support contact when the above steps have been completed.
Troubleshooting
| Error message | Solution |
|---|---|
| MSAL Error: Invalid Client errorMessage AADSTS65005: The application ‘xxxxxxxx-xxxx-xxxx-xxxx-xxxxxxxxxxxx’ asked for scope ‘user_impersonation’ that doesn’t exist. | Add the user_impersonation scope. |
| AADSTS9002326: Cross-origin token redemption is permitted only for the ‘Single-Page Application’ client-type. Request origin: ‘https://poziserver- | Check the redirect URI platform types. The site URL, for example https://<pozi-site-name>.enterprise.pozi.com/, should be configured under Single-page application. The callback URL https://<pozi-site-name>.pozi.com/api/v1/sitemgmt/login/entra/callback should remain under Web. |
| AADSTS50011: The redirect URI ‘https://xxxxxxxxxxxxxxxxxxx/’ specified in the request does not match the redirect URIs configured for the application ‘xxxxxxxx-xxxx-xxxx-xxxx-xxxxxxxxxxxx’. Make sure the redirect URI sent in the request matches one added to your application in the Azure portal. Navigate to https://aka.ms/redirectUriMismatchError to learn more about how to fix this. | Check that the redirect URI has been added under the correct platform type. It may also indicate that the application ID of the Pozi Server Enterprise Application was changed, deleted, or not properly assigned. |
| invalid_resource: AADSTS500011 - The resource principal named xxxxxxxxxxxxxxxxxxxxxxxxxxxxxxxx was not found in the tenant named xxxxxxxx-xxxx-xxxx-xxxx-xxxxxxxxxxxx. This can happen if the application has not been installed by the administrator of the tenant or consented to by any user in the tenant. You might have sent your authentication request to the wrong tenant. | Make sure you have provided the correct tenant ID and that you are logged into the correct account. |
AADSTS50105: Your administrator has configured the application Pozi Server (‘xxxxxxxx-xxxx-xxxx-xxxx-xxxxxxxxxxxx’) to block users unless they are specifically granted (‘assigned’) access to the application. The signed in user 'xxxxxxxxx.xxxxxxx@xxxxxxxxxxx.xxx.xxx.xx' is blocked because they are not a direct member of a group with access, nor had access directly assigned by an administrator. Please contact your administrator to assign access to this application. | Give the relevant users or groups access via Enterprise Applications. See the Assign users section. |
| Forbidden: This corporate app can’t be accessed. You are not authorized to access this application. Next Steps. Authorization failed. Make sure to assign the user with access to this application. | Confirm that the user, or a group the user belongs to, has been assigned access to the Enterprise Application. Also confirm that the Application Proxy URL opens successfully for that user. |
WFS3 (resource check) response contains "error": "invalid_tenant" | Confirm that the tenant ID is correct. |
AADSTS9002325: Proof Key for Code Exchange is required for cross-origin authorization code redemption | Confirm that the callback URL https://<pozi-site-name>.pozi.com/api/v1/sitemgmt/login/entra/callback has been added to the Web redirect URIs and not the Single-page application redirect URIs. |
After using “Login with Entra” the browser shows {"err_code":405,"err_desc":"Unauthorised: Rejected authorization code"} | Entra ID has rejected the login because the configuration is incorrect. Confirm that the Client ID, Tenant ID, and Secret are all correct. |