Site Manager
Pozi Site Manager gives GIS administrators ultimate control over their Pozi sites.
- manage user access
- create custom maps
- configure map extent, disclaimer and site logo
- manage third-party basemap and imagery layers
Note
The screenshots in this guide were taken from an earlier Site Manager build. Labels and layout may vary slightly between versions.
Before You Start
Before you begin, make sure you have:
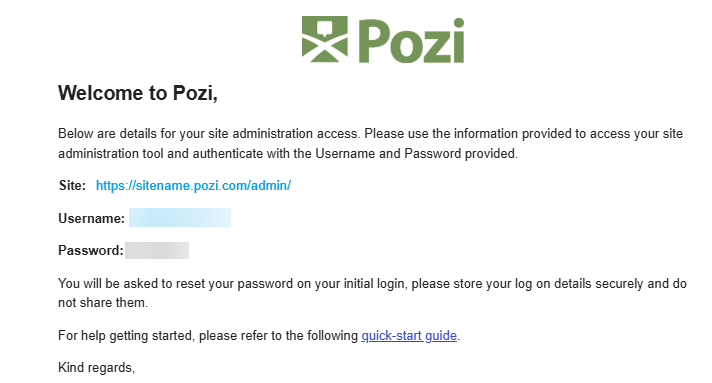
- the onboarding email containing your Site Manager URL, System Administrator (
SA) username, and temporary password - access to the organisation details needed for Entra ID sign-in and the QGIS Connector, if those items have not already been configured
- the logos you want to upload, prepared as
ICO,PNG, orSVGfiles under100 KB
If your organisation still needs to complete the Microsoft Entra or Application Proxy setup, work with your IT team and refer to the Entra ID setup guide.
Sign In and Get Oriented
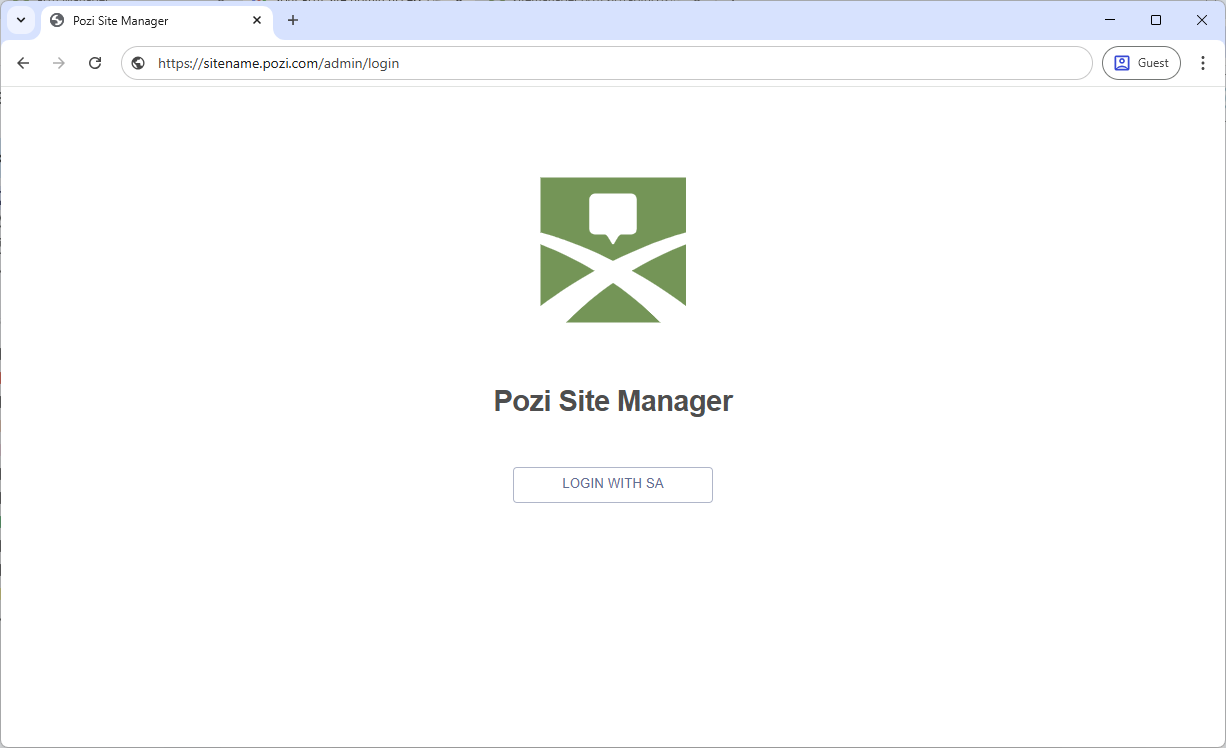
Use the Site URL from your onboarding email to open Site Manager in your browser.
- Select LOGIN WITH SA.
- Sign in with the
SAusername and temporary password from the onboarding email. - Reset the password if prompted.
After you sign in, the home page displays the main Site Manager navigation on the left and the selected settings page in the main panel.

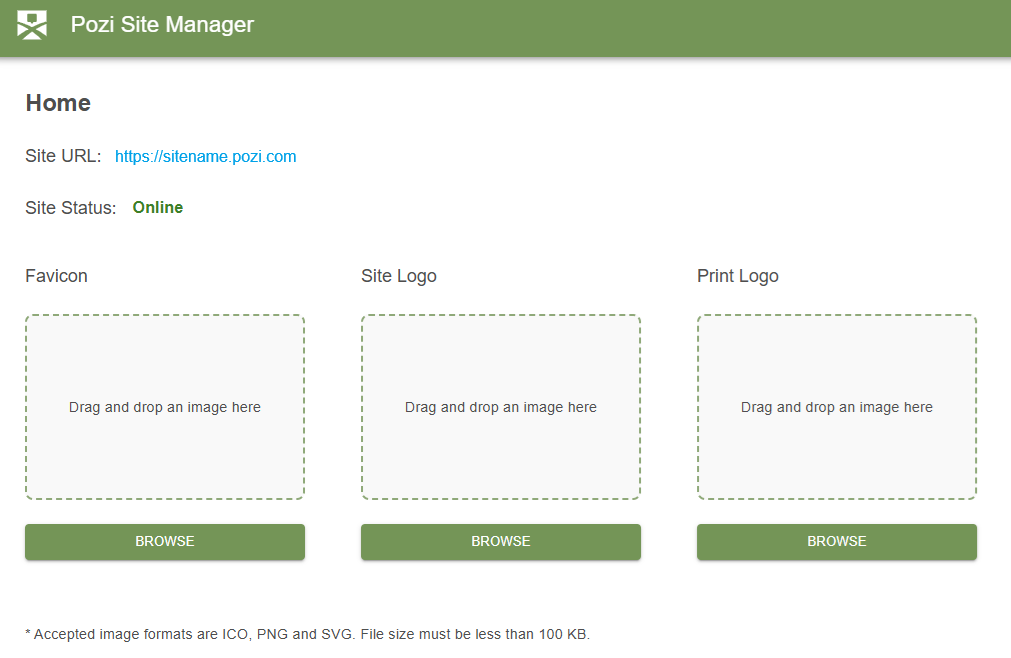
Home Page
The Home page controls settings that apply across the site:
- Site URL opens the published Pozi site in a new browser tab.
- Site Status shows whether the site is currently online.
- Favicon controls the browser tab icon.
- Site Logo controls the logo shown in Pozi maps.
- Print Logo controls the logo included in print output.
Manage Access
The Security page controls who can administer the site and whether sign-in is linked to your organisation’s Entra tenant.
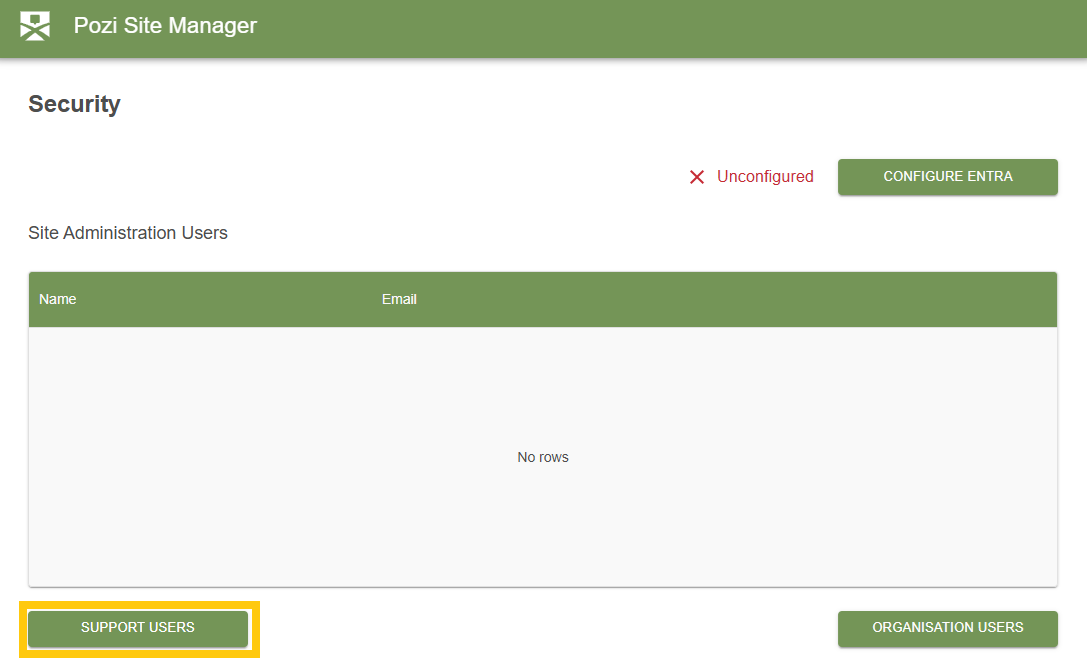
Support Users
Support users are consultants from your reseller or Pozi support provider. You can grant them temporary access when you need help with a configuration task.
To add a support user:
- Open Security.
- Select SUPPORT USERS.
- Enable Allow Access for the required consultant.
- Save the change.
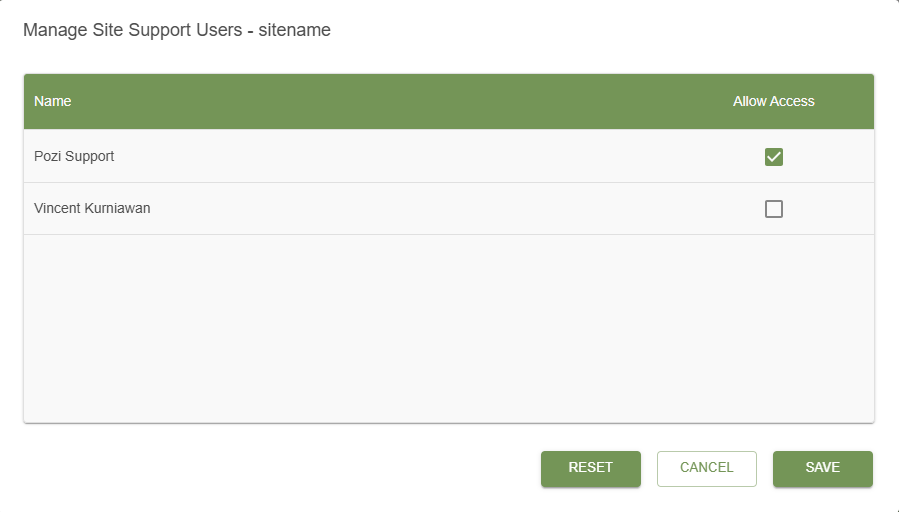
Remove support access by returning to the same screen and clearing the relevant Allow Access checkbox.
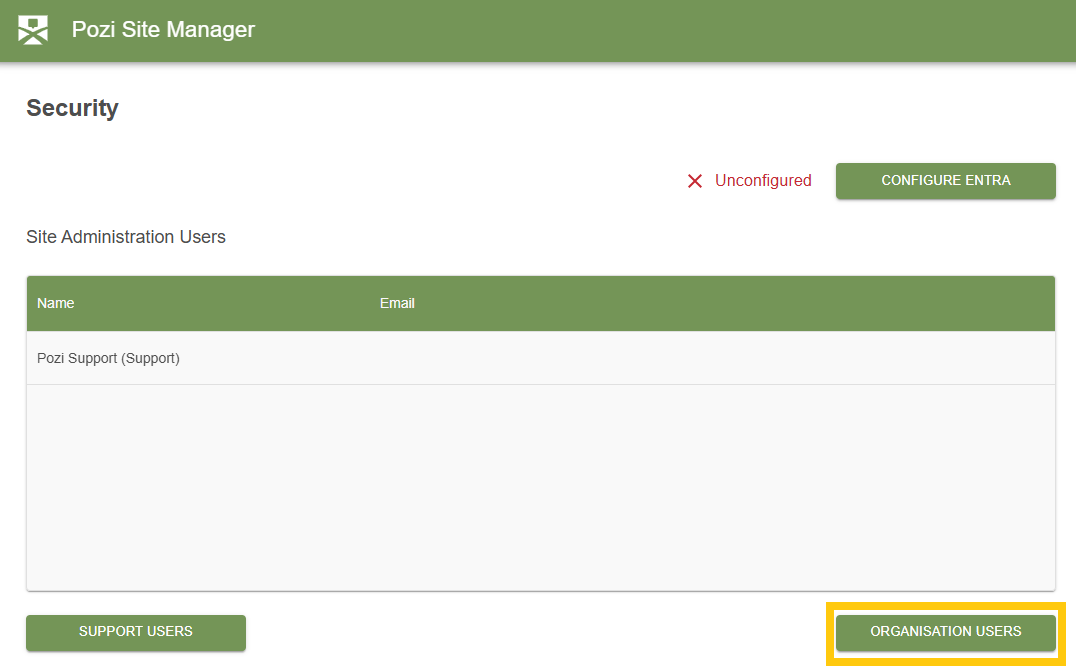
Organisation Users
Organisation users can sign in with their normal work account instead of the shared SA credentials. This is usually the preferred long-term approach for GIS administrators.
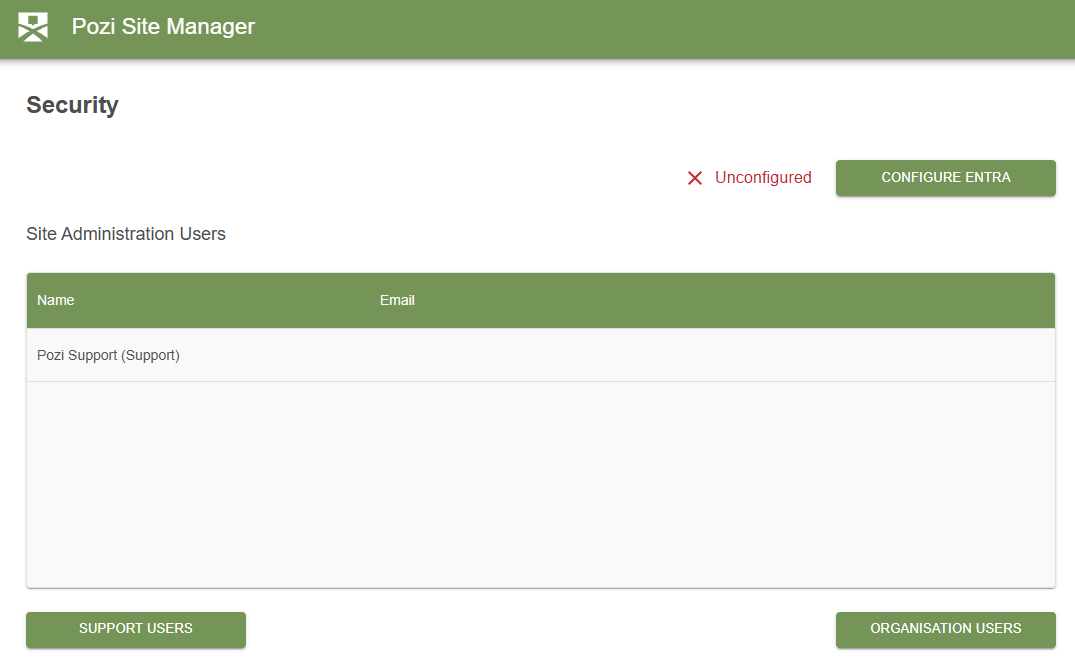
To add organisation users, open ORGANISATION USERS and select the people who should have access.
Configure Entra
Organisation users and private map access depend on Microsoft Entra being configured first. Site Manager exposes the fields you need, but in most organisations the values come from IT.
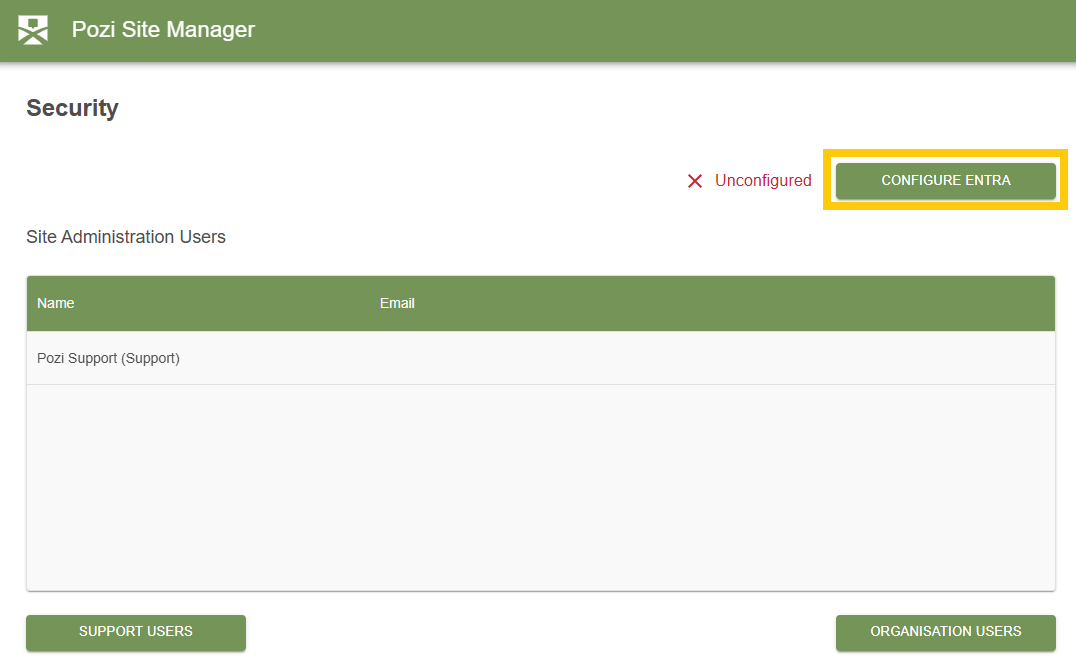
The Entra configuration requires:
- Application (client) ID
- Directory (tenant) ID
- Client secret
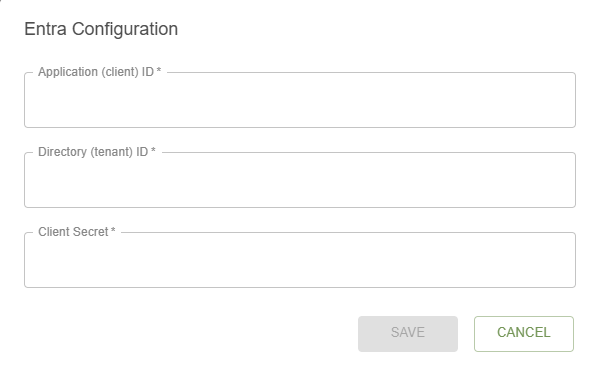
If these values are not available, ask your IT team to complete the required setup and refer them to:
Connect Internal GIS Resources
The QGIS Connector links Site Manager to your organisation’s QGIS Server and the QGIS project directory published through Entra Application Proxy.
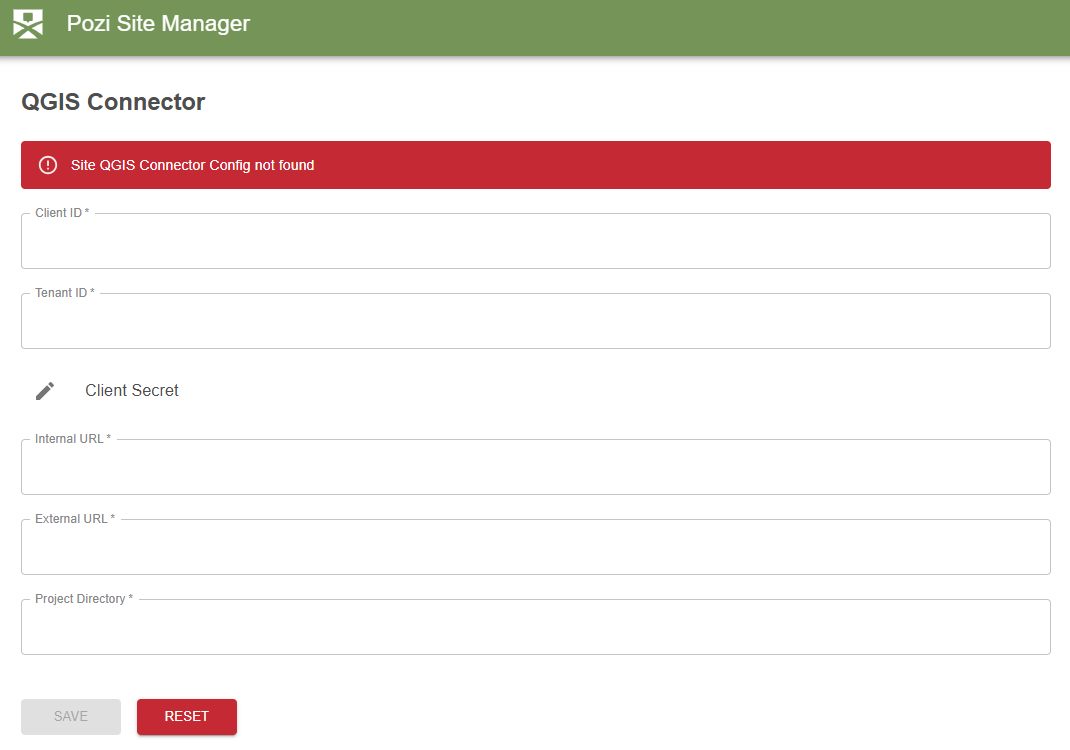
The fields on this page are:
| Setting | Description |
|---|---|
Client ID | The Entra application client ID for the QGIS Connector. |
Tenant ID | Your organisation’s Entra tenant ID. |
Client Secret | The client secret created in Entra. |
Internal URL | The internal QGIS Server URL, such as http://<internal-server-name>/pozi/. |
External URL | The external Application Proxy URL, such as https://poziserver-<entra-application-client-name>.msappproxy.net/pozi/. |
Project Directory | The folder on the QGIS Server where the published .qgs projects are stored. |
Use a project directory path without spaces if possible. This avoids URL encoding issues when Site Manager references project files.
Create and Manage Maps
The Maps page is where you organise the published map experiences for different audiences and business needs.
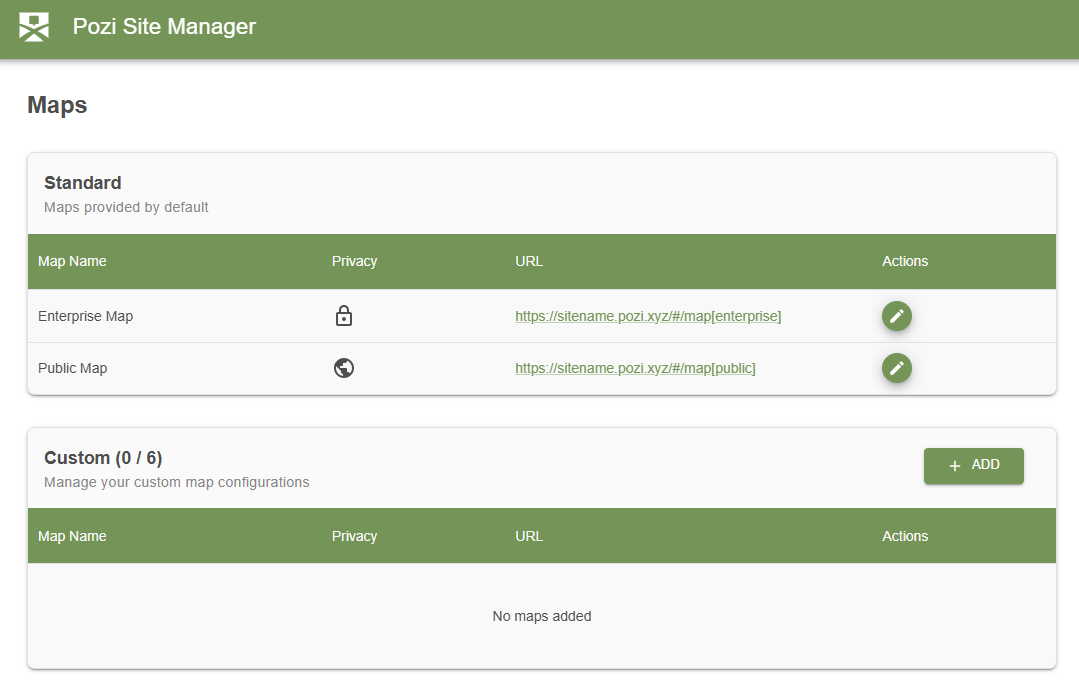
Standard and Custom Maps
Every site includes two standard maps:
- Enterprise Map for private, organisation-only use
- Public Map for content that can be exposed publicly
In addition, you can create up to six custom maps for specific teams, projects, or public-facing initiatives.
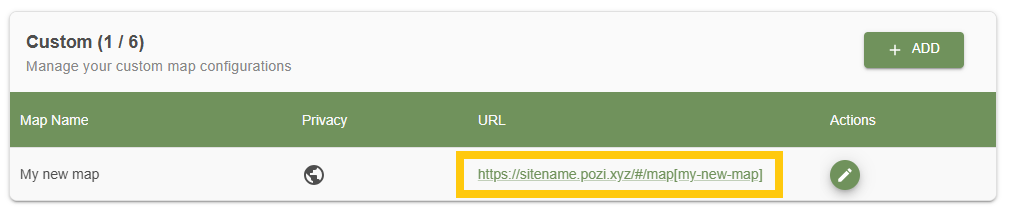
Create a Custom Map
To create a custom map:
- Open Maps.
- In the Custom section, select ADD.
- Enter a clear map name.
- Review the URL value generated from that name.
- Choose whether the map should remain private or be made public.

The generated URL segment becomes the map parameter for that map. You can change it before creation, but treat it as permanent once the map has been created.
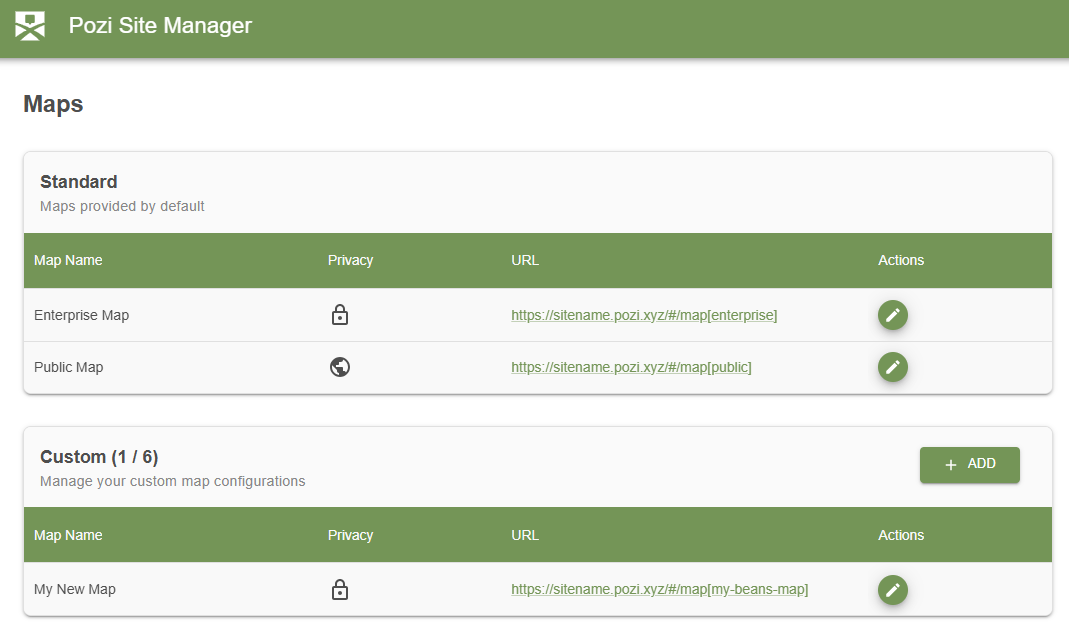
You can open the map directly by selecting its URL from the maps list.
Edit a Map
Select the edit action for any standard or custom map to update its settings.
On the edit screen you can update:
- the map name
- the browser tab title
- whether the map is public or private
- the bounding box
- the about text
- the print disclaimer
- the datasets attached to the map
If Entra group claims have been configured, you can also use group-based access for private maps.
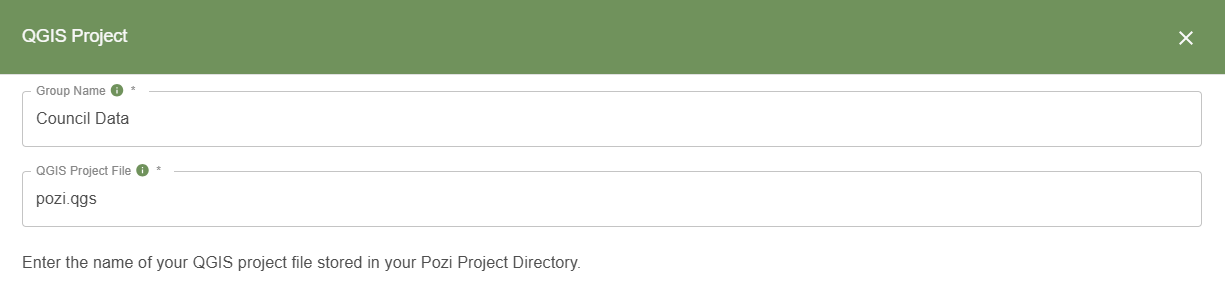
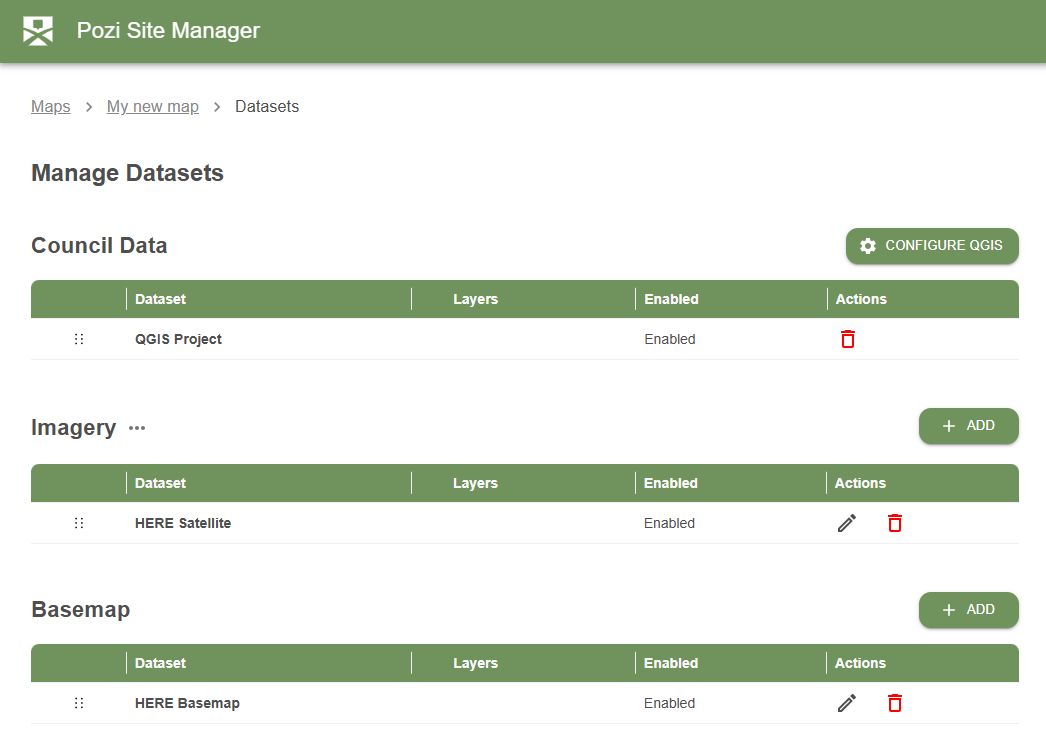
Add a QGIS Project to a Map
To attach a QGIS project:
- Open the map for editing.
- Select MANAGE DATASETS.
- Choose Configure QGIS.
- Enter a group name.
- Enter the QGIS project filename, including the extension, for example
pozi.qgs.
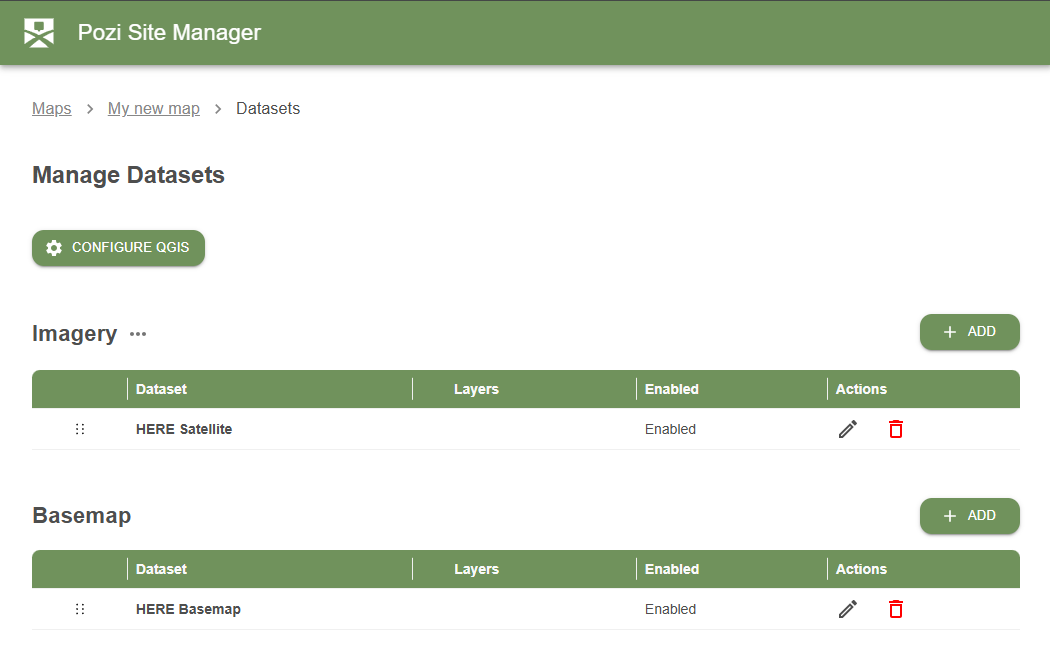
After saving, the QGIS project appears in the map’s dataset configuration.
New maps also include default basemap and imagery entries so you can start testing immediately and then replace them with your preferred sources later.
Add Data Sources
The Data Sources page manages external imagery and basemap services that can be used across your maps.
Out-of-the-box data sources may already be available, but you can add your own connections as needed.
To add a new data source:
- Open Data Sources.
- Select ADD DATA SOURCE.
- Choose the service type, such as
WMSorXYZ. - Enter a clear name and the service URL.
- Configure authentication if the service requires it.
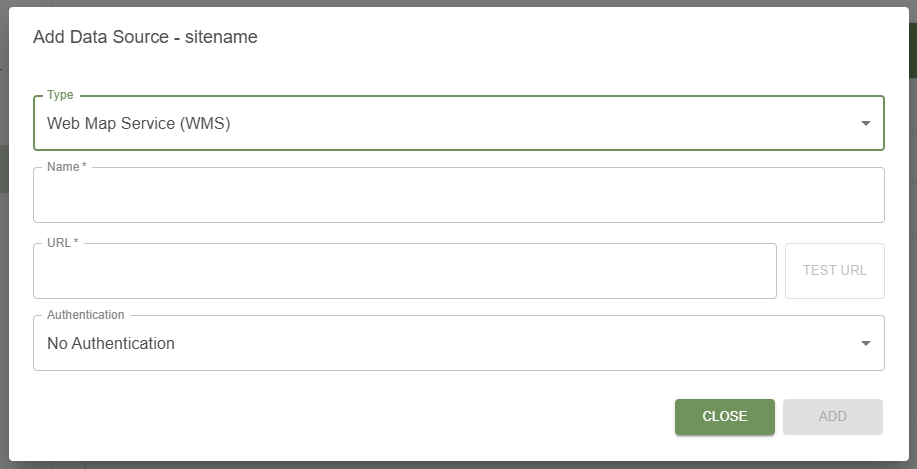
Depending on the service, authentication may be left open or configured with an API key or username and password. Once the data source is saved, you can add it to a map’s Imagery or Basemap group from the map edit screen.
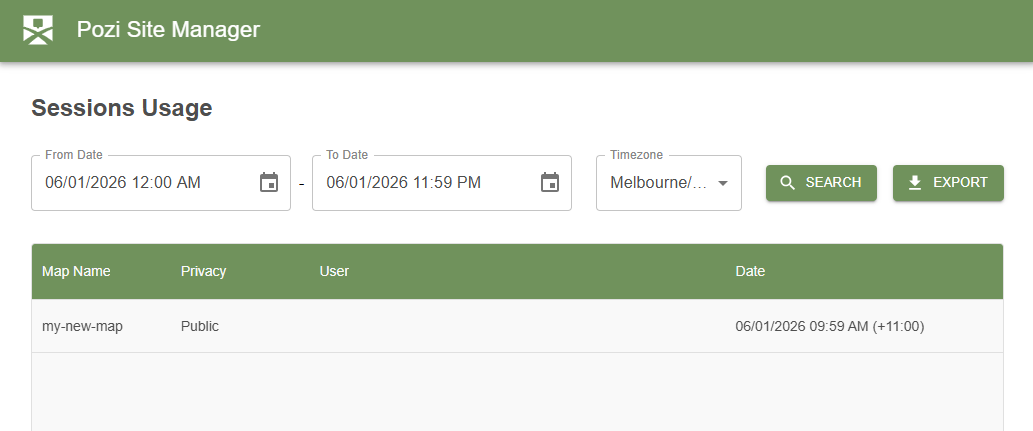
Sessions
The Sessions page provides self-service usage information for Site Manager resources. You can filter the date range, review recent activity, and export the results to CSV for further analysis.
Logout
Use Logout in the left-hand menu to end the current session. Sessions also expire automatically after one hour of inactivity.
Help and Support
We want your Pozi experience to be a positive one. If you need help or support, there are several ways to get assistance.
Documentation
Pozi documentation is available in the Admin Guide, including information about site administration and end-user features.
Reseller
Contact your reseller through their support channel for help with any issues you are experiencing.
Community
If you are not already a member, join the Pozi Community. Your reseller will aim to add you during the onboarding process, but in the event that they have not, please request access. This is where you can interact with other users and the core Pozi team.